Download the ISO
First things first, grab that Arch Linux ISO from https://archlinux.org. It’s like finding the Holy Grail, but instead of eternal life, you get endless configuration files.💡 Check: Is your system UEFI or BIOS?
Oh, the age-old question! This is where you play detective with your own computer. On Windows:- Press
Win + R, typemsinfo32and press Enter - Look for “BIOS Mode”:
- If it says UEFI, choose GPT
- If it says Legacy, choose MBR
Burning the ISO
Now for the digital bonfire! You’ll need to burn that ISO onto a USB drive or SD card. Think of it as giving your USB a new, more adventurous purpose. I’ve listed some tools for you, because who doesn’t love options?- Balena Etcher (So easy, even a beginner could use it… if they weren’t too busy being warned away from this whole guide)
- Rufus (A classic, for when you want a bit more control)
- Ventoy (The multi-ISO maestro)
Example using Rufus:
- Download and open Rufus
- Plug in your USB drive. Just a friendly reminder: if you have important data on it, kiss it goodbye. It’s about to be wiped faster than your memory after a long Arch debugging session.
- Set the following:
- Device: Your USB drive, obviously.
- Boot selection: Click SELECT and choose the
archlinux-*.isofile. Don’t worry, it won’t bite. - Partition scheme:
- Use MBR for Legacy BIOS boot (the ancient way)
- Use GPT for UEFI boot (the slightly less ancient way)
- File system: Leave as FAT32. Don’t get fancy now.
- Click START
- If it asks, always choose “Write in ISO Image mode (Recommended)”. Because recommendations are usually right, right?
- Wait. Just wait. It’s like watching paint dry, but with more flashing lights.
Shrinking Windows Partition
Time to make some room for your new obsession. Windows won’t know what hit it.- Open Disk Management (Win + X → Disk Management)
- Right-click C: → Shrink Volume
- Enter an amount in MB. Aim for around 50GB-100GB. You know, just enough to make Windows feel a little cramped.
- After the shrinking magic, you’ll see some unallocated space. That’s your future Arch home!
Entering in BIOS
Prepare for the grand entrance into your system’s inner sanctum. This is where you tell your PC who’s boss.- Restart your PC
- As soon as it flickers to life, repeatedly mash that BIOS key. It’s a race against time!
Common keys (because uniformity is overrated):
F2(Dell, Lenovo, Acer, ASUS)Del(MSI, ASUS desktops)F10/Esc(HP)F12(boot menu on many systems)
- Disable Secure Boot. Because who needs security when you’re installing Arch? (Just kidding, it’s usually required).
- Set your USB as the first boot device. Let’s make sure your PC knows its priorities.
Boot Into the Pendrive
Alright, you’re in the Arch live environment. Time to type some commands and feel like a hacker from a 90s movie.Partitioning
This is the moment of truth! This step is incredibly delicate. One wrong move and your data might just vanish into the digital ether. Proceed with the caution of a bomb disposal expert.

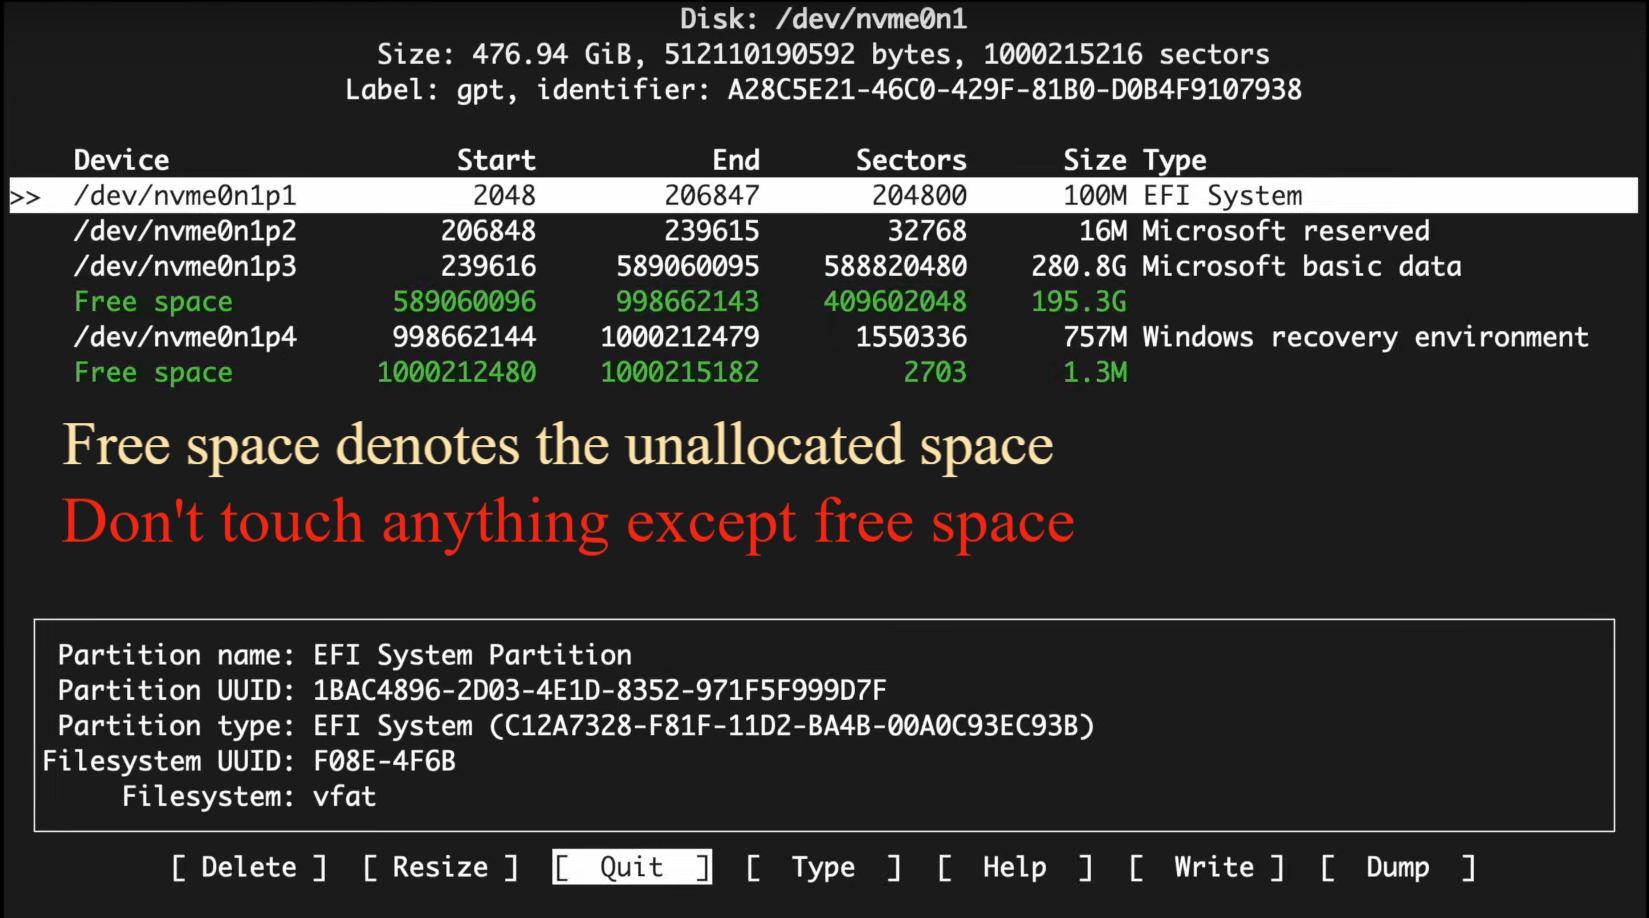
-
Create a 512M EFI system partition. This is where your computer looks for boot stuff.
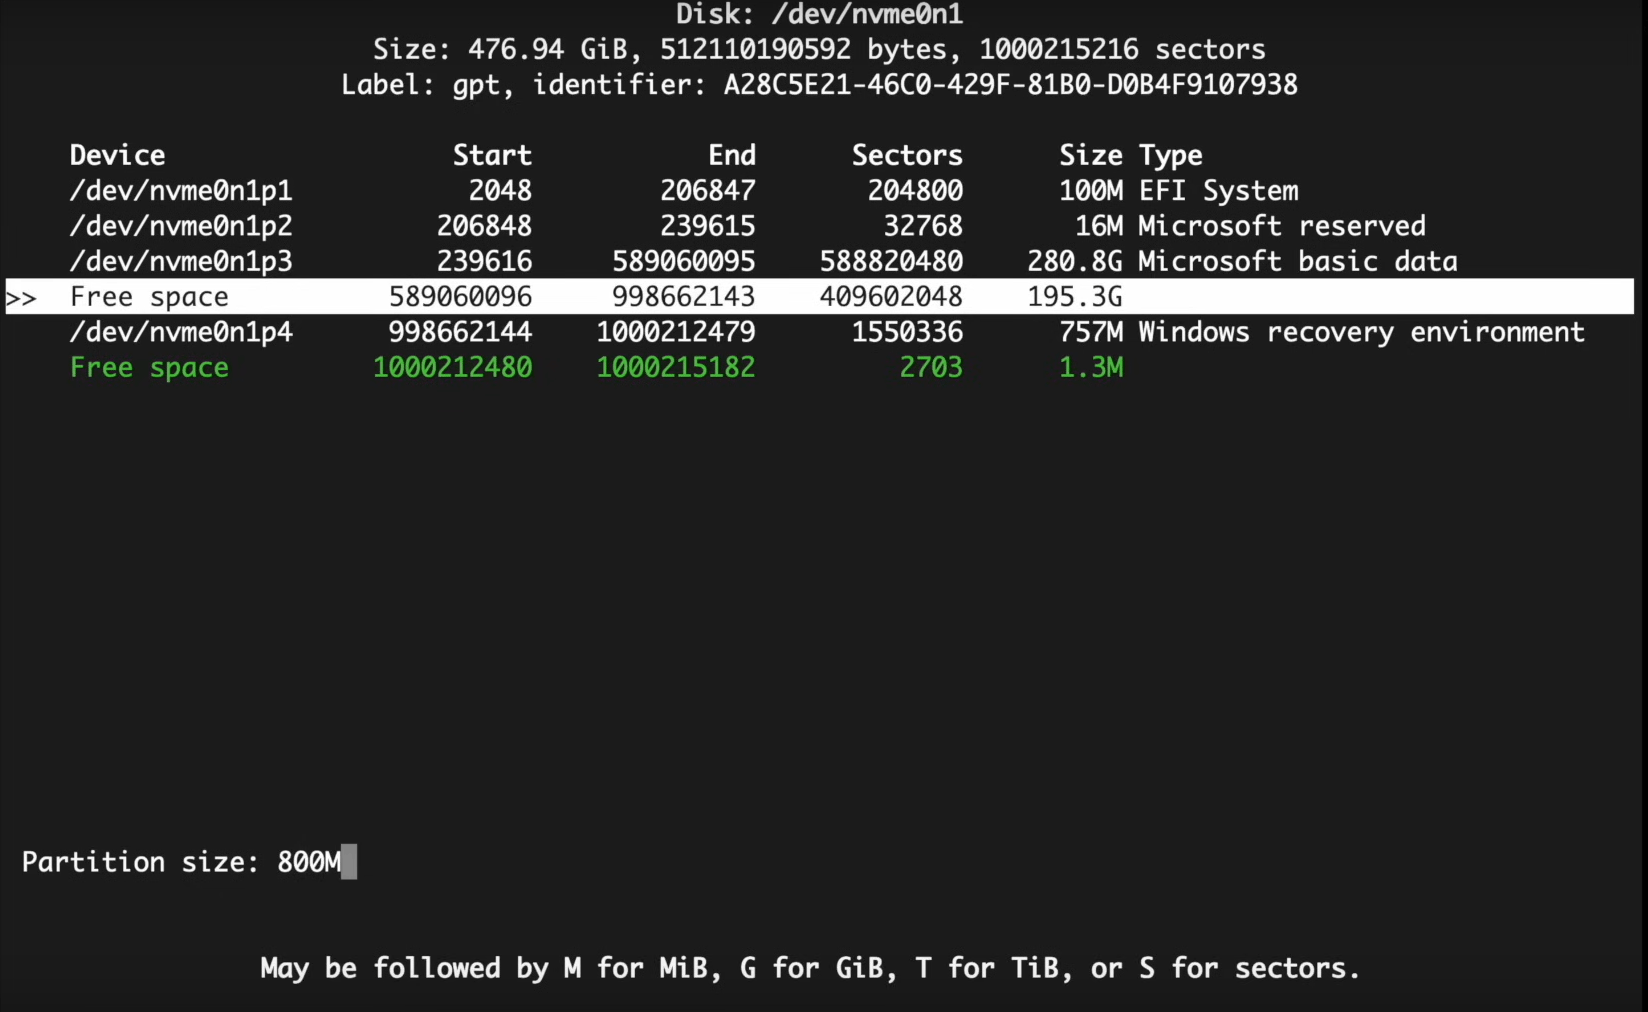
- Press
Enter
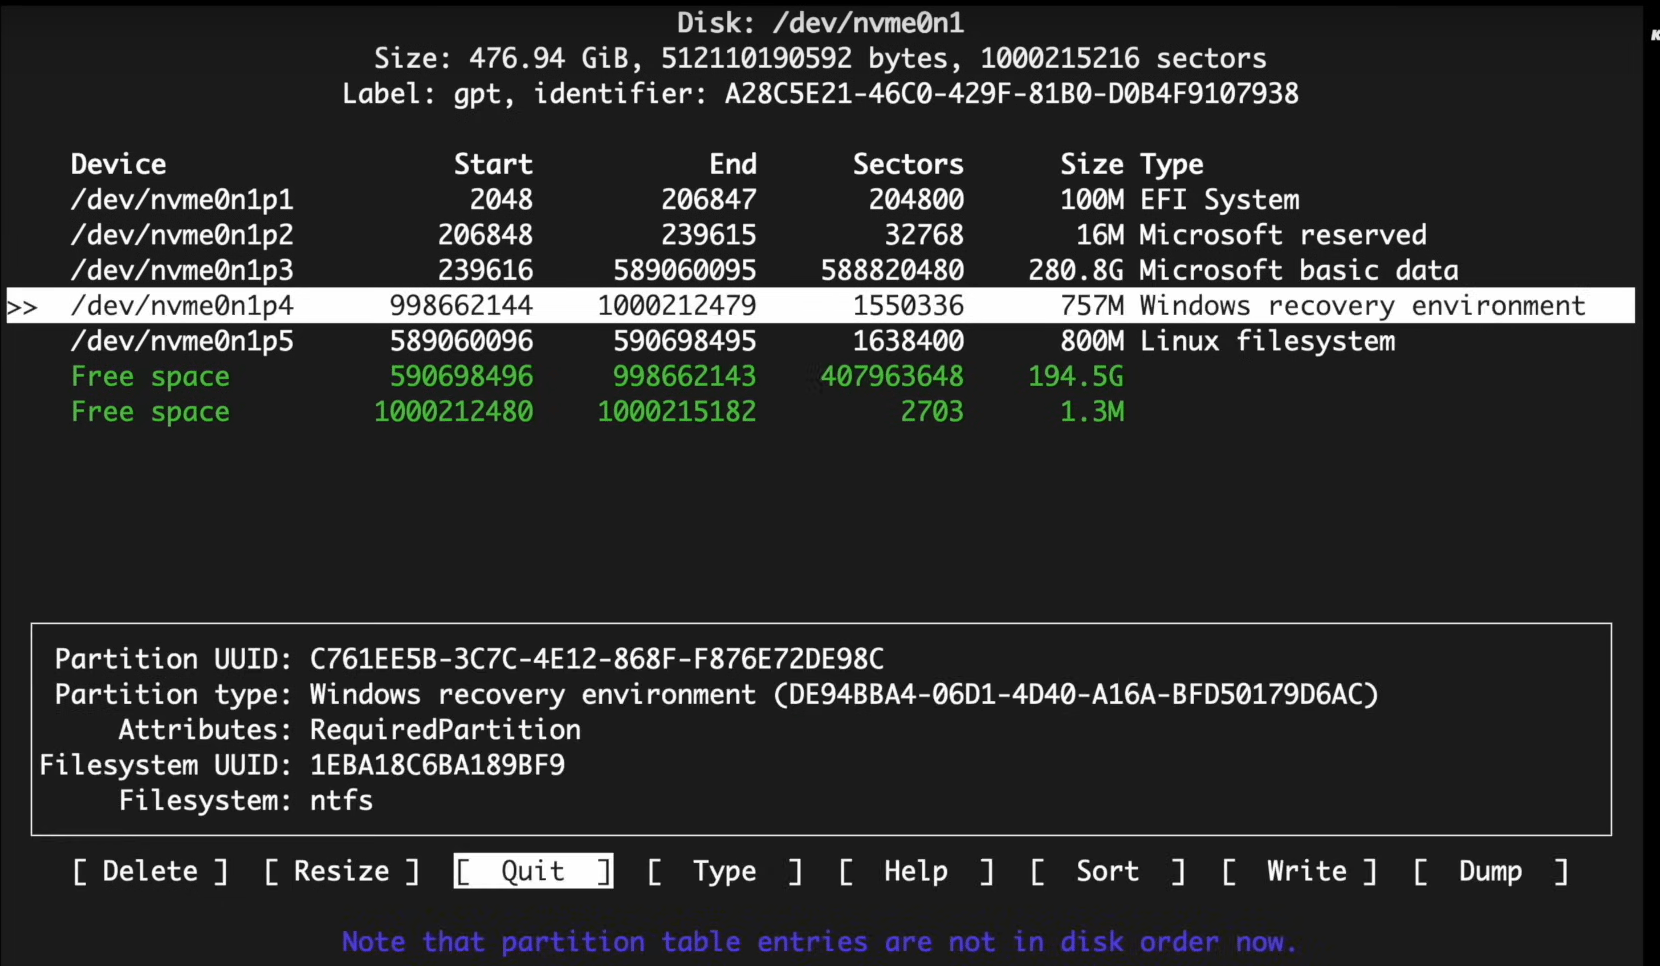
- Select the newly created partition (i.e
p5here). - Go on
Typeand pressEnter.

- Choose EFI System. Because it’s an EFI partition, obviously.
- Press
- Create an 8G (or whatever your RAM is) Linux swap partition. This is like your computer’s temporary memory overflow. If your RAM is huge, you might not even need swap, but better safe than sorry!
- Create the remaining space as a Linux filesystem partition. This will be your main Arch home. Make it big and comfy!
- Write the changes to the disk (be absolutely sure!) and then quit. You’ve sculpted your storage!
lsblk again and VERIFY that everything is mounted where it should be. Trust me on this one.
Install Base System
Setup Reflector
Create Yourself in the Arch World
%wheel ALL=(ALL:ALL) ALL.
This makes users in the wheel group (like your new user) able to use sudo. It’s like giving them a magic wand.
Ctrl+O to save changes, Ctrl+X to exit.
Timezone Configuration
Locale Configuration
en_US.UTF-8 UTF-8
LANG=en_US.UTF-8.
Hosts Configuration
archlinux or whatever creative name you’ve conjured up.
archlinux with your chosen hostname if it’s different.

Bootloader
GRUB_TIMEOUT to 20 seconds. This gives you plenty of time to choose between Arch and Windows (if you kept it).
Uncomment GRUB_DISABLE_OS_PROBER=false. This is the magic line that makes Windows appear in your GRUB menu. You’re dual-booting, you magnificent beast!
Write the changes (Ctrl+O) and exit (Ctrl+X).
write the changes and exit
Dotfiles
Files starting with a. are like hidden treasures, holding the keys to your system’s configuration and secrets. Get ready to personalize!
End-4 Dots
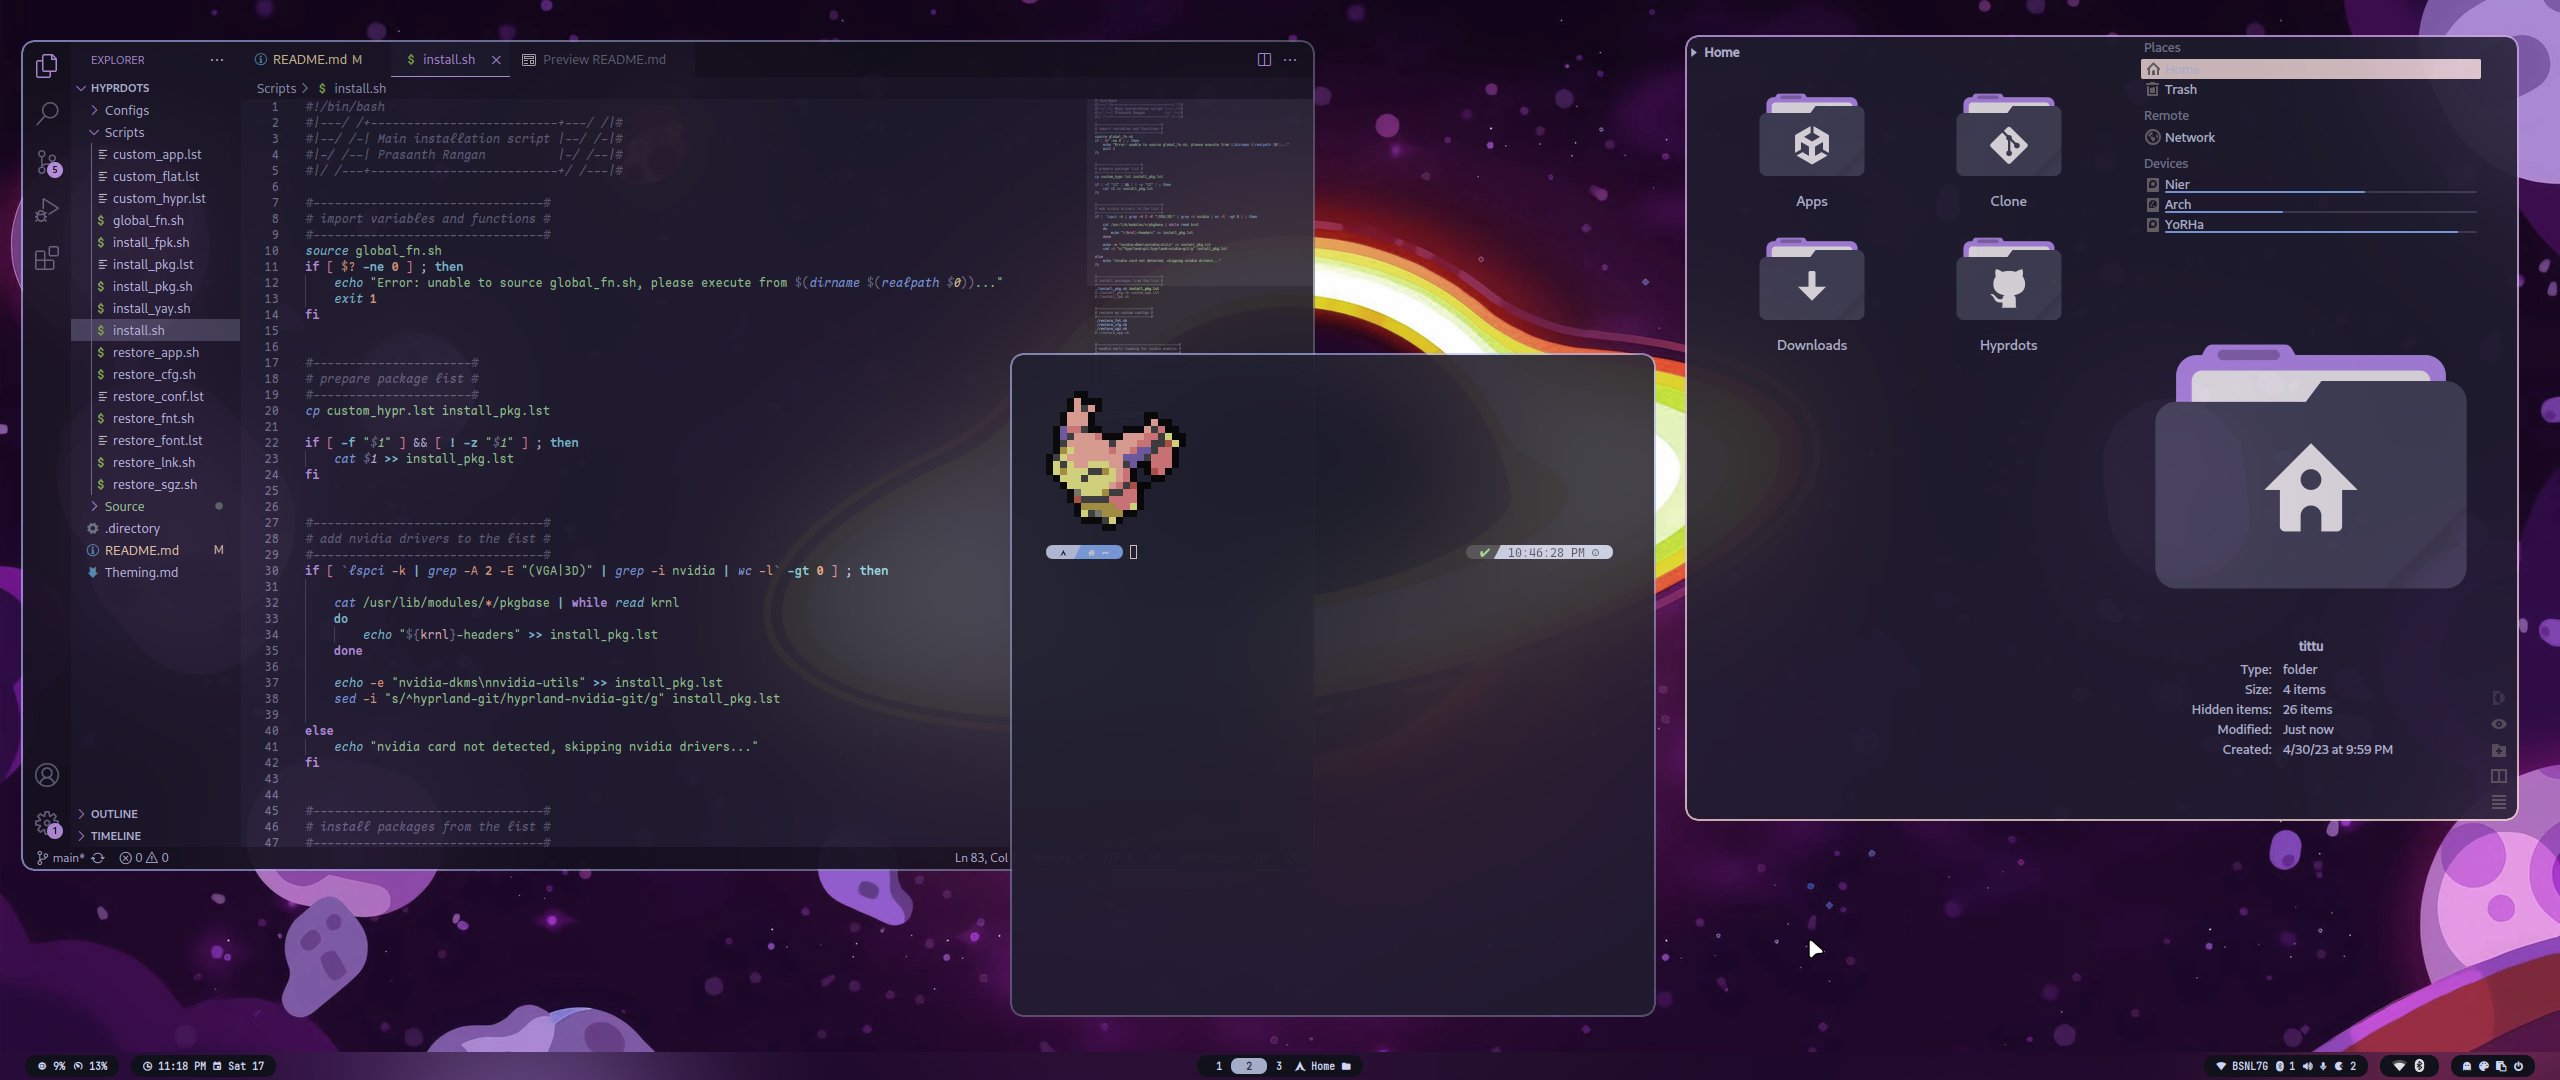
HyDE (Formerly Hyprdots)
ML4W Dotfiles